Payroll
Federal 940 Form
The
Payroll 940 Browse Screen
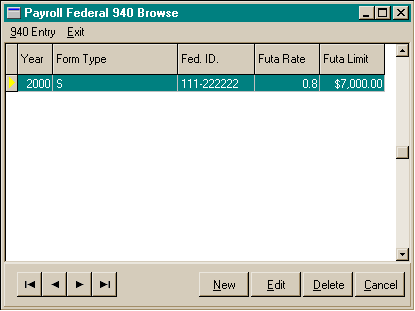
The
Payroll Federal 940 Annual Tax Return Entry Screen – Company Information
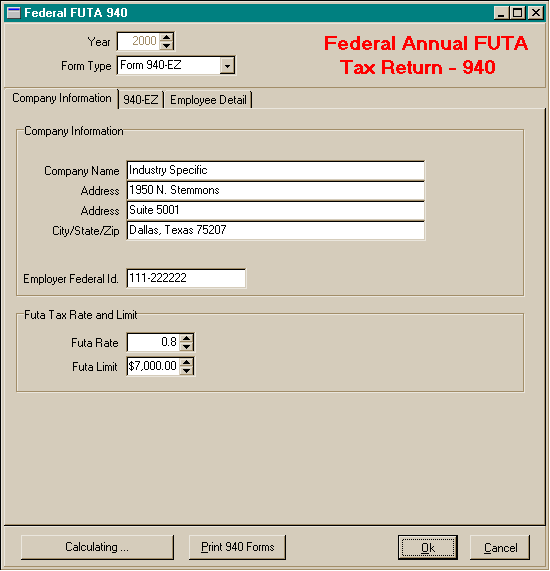
The
Payroll Federal 940 Annual Tax Return Entry Screen – 940 EZ
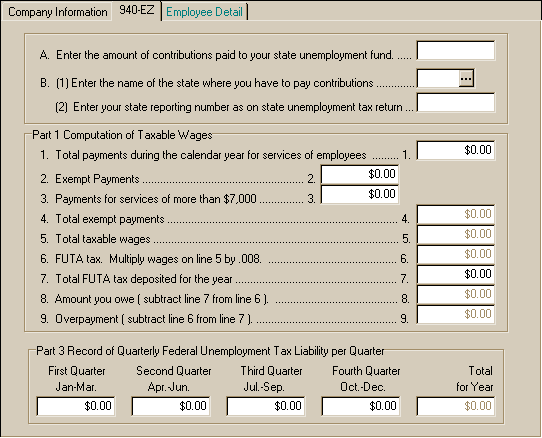
The Payroll
Federal 940 Annual Tax Return Entry Screen – 940 - Part 1
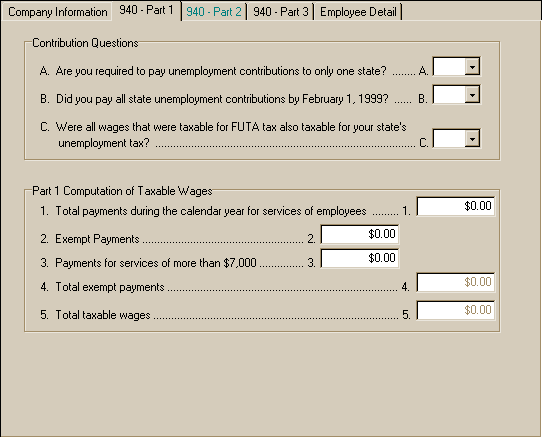
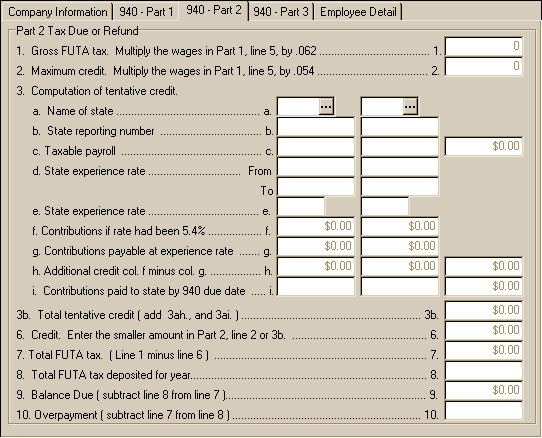
The Payroll
Federal 940 Annual Tax Return Entry Screen – 940 - Part 2
The Payroll
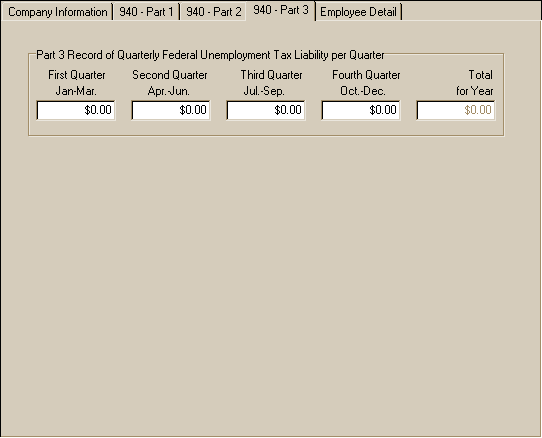
Federal 940 Annual Tax Return Entry Screen – 940 - Part 3
The
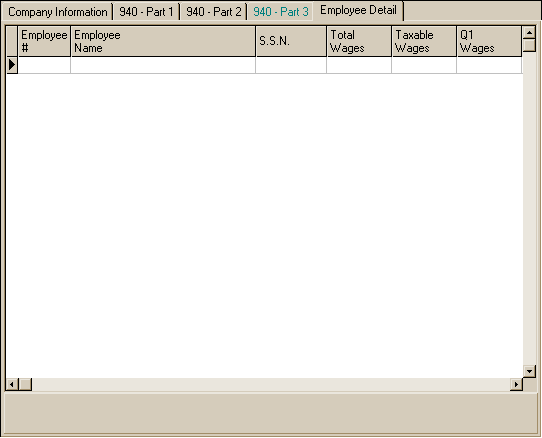
Payroll Federal 940 Annual Tax Return Entry Screen – Employee Detail
Federal
940 Annual Tax Return Data
- Year: The year this report is to be based. There must
be a Federal Tax table on file for the year prior to completing a 940 return.
- Form Type: The type of 940 to be filed. The options
are 940EZ and 940.
- Company Name / Address: This information is maintained
in the Company Parameters area. If the information needs to be changed for
this return, the fields may be edited.
- Employer Federal Id: This information is maintained
in the Company Parameters area. If the information needs to be changed for
this return, the fields may be edited.
- Futa Rate: This information is maintained in the Federal
Tax Table for the filing year.
- Futa Limit: This information is maintained in the Federal
Tax Table for the filing year.
- 940EZ: The form 940 EZ entry items.
- 940-Part 1: The form 940 Part 1 entry items.
- 940-Part 2: The form 940 Part 2 entry items.
- 940-Part 3: The form 940 Part 3 entry items.
- Employee Detail: The employee data totals calculated from the payroll
history.
- Calculate from Payroll History: This button will perform
all calculations for the Federal 940 Annual Tax Return based on the payroll
checks that have been posted to history for that year. If necessary, you
may make corrections or adjustments to these fields. Also, if you do not
have a check history for this quarter, all entries may be entered manually,
and the program will perform the calculations.
- Important: If manual entries or adjustments are made
for this return, and if you choose the ‘Calculate from Payroll History’ button,
all manual entries and adjustments will be lost and will have to be re-entered.
To
enter a Federal 940 Annual Tax Return:
- From the Year End menu, choose Payroll Federal 940 Form.
- In the Payroll Federal 940 Browse window, choose the New button at the bottom
right.
- Select the Year for the return to enter.
- Select the Form Type for the return to enter. The options are:
- Select Calculate From Payroll History. The 940 entry screen will be filled
out with data from the employee payroll history files.
- Review the form and make any adjustments or corrections that may be necessary.
- When you have completed your entries, choose the Ok button to save the information.
- Choose the Cancel button if you wish to cancel the Return entry.
To
edit a Federal 940 Annual Tax Return:
- From the Year End menu, choose Payroll Federal 940 Form
- In the Payroll Federal 940 Browse window, choose the Edit
button at the bottom right.
- Edit the 940 return information as needed
- When you have completed your entries, choose the Ok button
to save the information.
- Choose the Cancel button if you wish to cancel any changes
to the 940 record.
To
delete a Federal 940 Annual Tax Return:
- From the Year End menu, choose Payroll Federal 940 Form.
- In the Payroll Federal 940 Browse window, highlight the 940
return you wish to delete and choose the Delete button at the bottom right.
- Choose the Yes button to delete the 940 record.
- Choose the No button if you do not wish to delete the 940
record.
To
print the Federal 940 Annual Tax Return:
- Note: If you are printing directly onto a preprinted
copy of the Federal form 940, and you want the report to include your Name,
Title, and the Date Filed, enter this information under the ‘Filing Information’
tab.
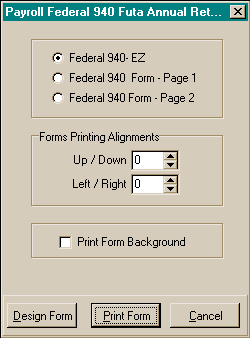
- Report Type: The type of report to print. ‘Form 940
– Page 1’ prints the first page of the 940 return. If ‘Print Form Background’
is not ‘Checked’, the Federal form may be inserted into your laser printer
and the information is printed directly on the form. . ‘Form 940 – Page
2’ prints the second page of the 940 return, or ‘Schedule B’. If ‘Print Form
Background’ is not ‘Checked’, the Federal form may be inserted into your laser
printer and the information is printed directly on the form. ‘940 Full Page
Report’ prints the information for the 940 and the Schedule B on a single
page for use in transferring the information to a form 940.
- Company Name / Address: This information is maintained
in the Company Parameters area. If the information needs to be changed for
this return, the fields may be edited.
- Form Printing Alignments: Depending upon your operating
system, your computer, your printer drivers, and any or all of these, some
times the data printed directly on a form will not line up with the actual
form. If this is the case with your printing, use this area to adjust the
alignment of the data items on the form. The increment arrows will change
the line increment by 0.05 of one inch for each click. Check your printing
by first printing the form on a blank sheet of paper and placing it over your
form to check the data alignment before printing on the actual form.
- Print Form Background: If this box is ‘Checked’ and
the ‘Report Type’ is Page 1 or 2 then the form will be printed with the data.
- From the Year End menu, choose Payroll Federal 940 Form.
- In the Payroll Federal 940 Browse window, highlight the 940
return you wish to print and click on the edit button in the lower right corner.
- On the Payroll Federal 940 Annual Tax Return Screen, choose
‘Print 940’.
- In the 940 Annual Report window, choose the report type. The
options are:
- Federal 940 EZ
- Federal 940 Form - Page 1
- Federal 940 Form - Page 2
- Choose the Print Form button.
- The print preview window will appear.
- Choose the page view buttons to size the previewed report,
and the page navigator buttons to scroll forward and backward the report pages.
- Choose the printer speed button to print the report. The printer
dialog box will appear. Make any changes necessary. You may change the number
of copies, page range, and the designated printer.
- Choose the Ok button to send the report to the printer.
- Choose the Close button to end the print preview.


